The old butcher I trained under had one line he repeated every time a cook reached for a knife that would not cut: a dull knife is a confession. He was not talking about the blade. He was talking about the person holding it, and about the drawer it came out of.
Kitchen knife storage is the least glamorous part of a knife habit, and it is the part that decides whether your edges survive the week. I have watched cooks baby a $200 chef's knife through a Saturday service and then bury it under a can opener and a vegetable peeler at close. A month later the tip is bent, the edge is chipped, and they blame the steel.
You can fix almost all of it in twenty minutes with a drawer insert, a couple of edge guards, and one rule about water. Here is how I set up a knife drawer, in order, plus the two inexpensive pieces that do most of the work.
Why you should trust me
I have spent 16 years in professional kitchens, six as a line cook in fine dining and four running a butcher shop. I have sharpened thousands of blades, from $20 stamped knives to $400 Japanese gyutos, and I own exactly one knife I would not let out of my sight. I keep a 1,000-grit stone on the counter and a honing steel within arm's reach of the board.
When I judge a knife I ask four things. Does it hold an edge through a full prep shift. Is the handle comfortable after 200 cuts. Can I sharpen it on a stone without fighting the bolster. Would I reach for it on a busy Saturday. A drawer setup has a simpler test. Can you open the drawer at chest height, reach in without looking, and come out holding a handle instead of an edge?
I have not run either of the two products below through a full prep shift, and I am not going to pretend I have. What I can tell you is what they are, who they suit, and how to use them so the blades stay alive.
The short answer
Two things keep a knife drawer from ruining knives: edges that never touch anything hard, and a drawer that never stays wet. Everything else is preference.
That means a slotted insert or edge guards for separation, a dry drawer, and a rule that no knife goes back in until it is wiped dry. If you get those three right, the drawer stops being a threat and starts being storage.
The two pieces that do the work
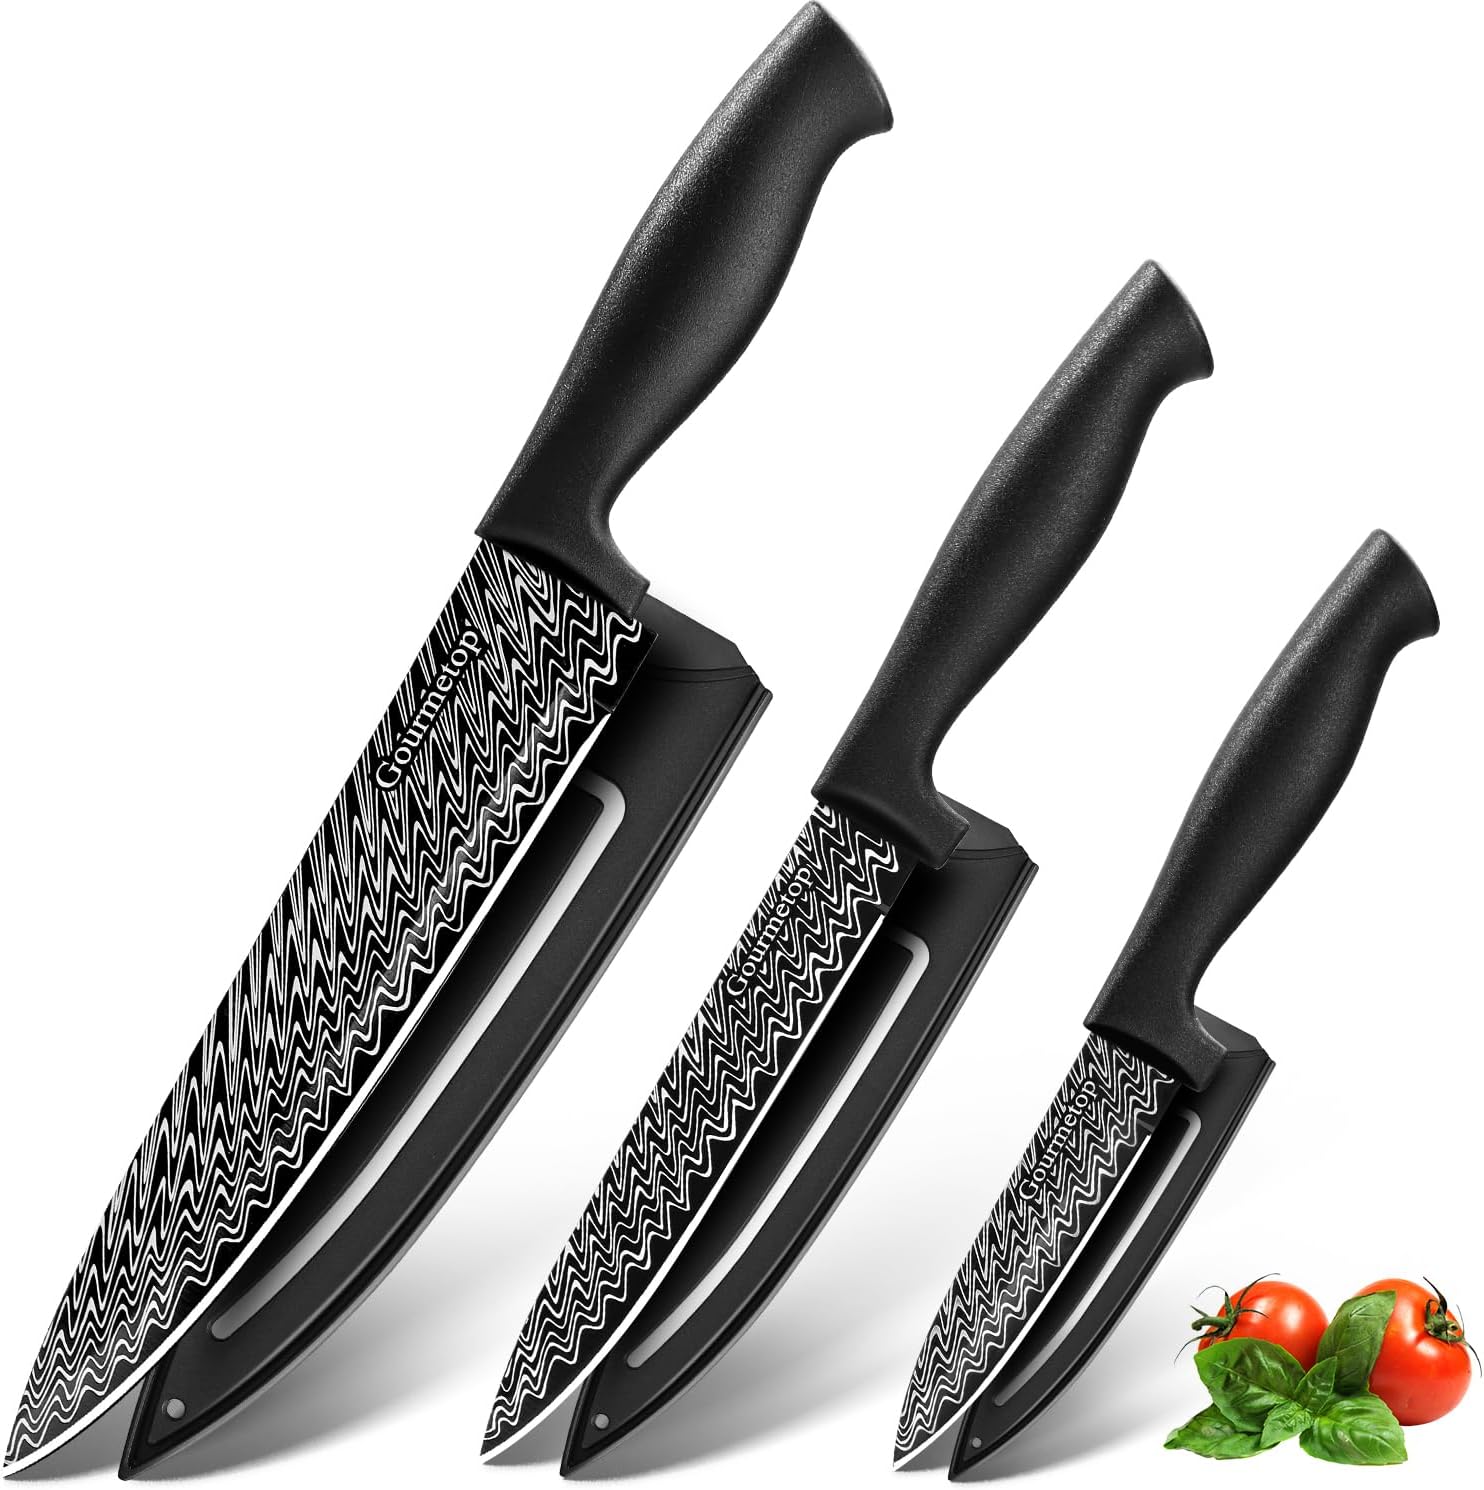
The knives: Gourmetop 3PCS Kitchen Knife Set with Cover, Sharp Black Knives for Cooking
 Visit on Amazon →
Three knives with covers. That is the whole pitch, and for a lot of people it is the right one. The covers do double duty: they protect the edge when the knife is rattling around in a drawer, and they protect your hand when you pull it out of a bag or a tote. If you are setting up a first apartment, a rental kitchen, a camper, or a drawer for a kid heading to college, a small set with covers solves the storage problem and the transport problem in one purchase.
Be honest with yourself about what this is. At this price point you are buying a starter set, not an heirloom. I would not expect the edge retention of a German chef's knife that costs ten times as much, and I would not hand it to a line cook on a Friday night. What I would do is use it to learn to sharpen. Buy a stone, put an edge on these, and practice the angle until it is muscle memory. Then spend real money on one great chef's knife and keep this set for the jobs you do not want to risk the good blade on.
Flaws but not dealbreakers: Three knives is a starting point, not a full kit. You will still want a serrated bread knife that can actually slice bread and a honing steel. Covers also get lost, which is exactly why the drawer insert below earns its place.
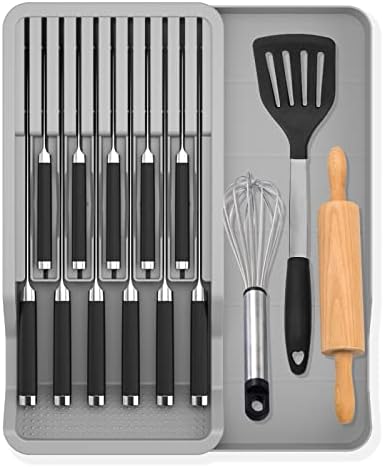
The organizer: Expandable Drawer Knife Insert Organizer - Plastic Knife Storage Tray for Kitchen Drawers, Adjustable to Fit 11 Knives & Utensils, BPA-Free, Ventilated, Space-Saving, Easy to Clean
 Visit on Amazon →
This is the piece that changes the drawer. It expands to fit the width of a standard drawer, and the slots hold knives and utensils upright and separated so no edge touches another edge or the side of the drawer. The listing says up to 11 knives and utensils, which is more than most home cooks own and roughly the point at which a drawer starts to feel crowded anyway.
Two details matter more than they sound. Ventilated matters, because a closed plastic tray traps moisture against steel and moisture is what rusts a blade you put away slightly damp. BPA-free and easy to clean matter because a knife drawer collects crumbs and flour dust, and a tray you can wipe out in thirty seconds is a tray that actually gets wiped out.
Flaws but not dealbreakers: Plastic will not outlast a hardwood insert, and an expandable tray has seams, so do not expect it to feel like furniture. Check the interior height of your drawer before you commit, because a tall insert in a shallow drawer means the drawer will not close. Measure first, expand second.
How to set up the drawer, step by step
Step one: Empty the drawer completely. Not the knives. Everything. The takeout menus, the twist ties, the second peeler you forgot you owned. You cannot plan a layout around clutter, and half the reason knives get damaged is that the drawer is full of things that are not knives.
Step two: Measure the interior. Width, depth, and height, in that order of importance. Width decides whether an expandable insert will span the drawer or rattle around. Height decides whether the drawer will still close with knives standing in the slots. Write the numbers on your phone before you order anything.
Step three: Decide which knives earn drawer space. For most home cooks that is a chef's knife, a paring or petty knife, a serrated bread knife, and maybe a boning or utility knife. That is the set. Everything beyond it is garnish. A knife that never gets used still takes a slot, still gets knocked around, and still needs to be dried.
Step four: Fit the insert and stop it from sliding. Expand it to the drawer width, leave a hair of clearance so it does not bind, and set it on a non-slip liner if your drawer bottom is slick. An insert that slides forward every time you open the drawer will eventually let a blade slip out of its slot.
Step five: Load blade-first, handle-out. Set each knife into a slot with the blade down in the slot and the handle toward the front of the drawer. When you reach in, your hand lands on a handle. When you close the drawer, the edge is sitting in air, not against plastic or steel. Never stack one blade on top of another and never let two edges share a slot.
Step six: Leave the gaps empty. An insert rated for 11 knives does not need 11 knives in it. Crowding is how edges touch. If you have to force a knife into a slot, the slot is the wrong size for that knife.
Step seven: Test it with your eyes closed. Stand at the drawer, open it, and grab a knife without looking. You should get a handle every single time. If you get a blade, or you have to dig, rearrange until you do not.
Step eight: Add a child lock if there are kids in the house. A drawer at waist height is a drawer a toddler can open. This is not a knife-quality question, it is a safety one, and it takes five minutes to solve.
The maintenance habit behind all of it
Sharpness is a maintenance habit, not a purchase. The best knife in the world goes dull, and the drawer setup above only buys you the time between sharpenings.
Hone before you use, not after. A honing steel does not sharpen anything. It realigns an edge that has rolled over, and it takes fifteen seconds. If you wait until the knife will not cut a tomato, you are past honing and into sharpening.
Sharpen on a stone every few weeks in a home kitchen, more often if you cook daily. A 1,000-grit stone is the workhorse. Hold a consistent angle, roughly 15 degrees for Japanese-style blades and closer to 20 for German and budget stainless, and let the stone do the work instead of pressing harder. If you have never sharpened before, practice on the inexpensive set in this guide rather than on your good knife.
Never put a knife in the dishwasher. Not the cheap ones, not the ones with plastic handles, not once because you are tired. Heat, water, and detergent destroy edges and handles, and the basket is a place where blades knock against each other for an hour.
Wipe it dry before it goes back in the drawer. This is the one rule that matters most. A ventilated insert helps, but ventilation is not a dryer. Water sitting against steel is rust, and rust is an edge you have to grind away.
Skip the knife block if you can. Most blocks grip the blade on insertion, and every insertion dulls the edge a little more. A drawer insert holds knives by the blade in a slot with clearance, which is a gentler way to store the knives you actually use. My daily knives live on a magnetic strip and the block stays for guests, which tells you what I think of blocks.
What this all costs
Both pieces here sit at the budget end of the market, which is the point. The organizer costs less than a single mid-tier chef's knife, and the knife set costs less than one professional sharpening service in a city that charges by the blade. Check current Amazon price on each and do the math against what you would spend replacing a chipped chef's knife in two years.
The real savings are not in the purchase. They are in the fact that a knife stored properly holds its edge longer, needs the stone less often, and does not get replaced because the tip snapped off against a can opener. Storage is cheap. Knives are not.
What I would skip
Fifteen-piece sets with four steak knives and a block you do not need. Any set under $100 that leads with the block instead of the blade. Bolsterless knives marketed as professional. Serrated bread knives that cannot slice bread. Drawer inserts that are taller than the drawer, because you will find out the hard way.
And skip the idea that you need a big set at all. A knife set is 80 percent chef's knife. The other pieces are garnish. Buy fewer knives, store them properly, and put the money you saved into a stone and a honing steel. That combination will outlast three cheap sets.
Start with the drawer. Empty it, measure it, fit an insert, and put the covers on anything that leaves the house. Then learn to sharpen on the knives you are not afraid to scratch. That is the whole job, and it is a twenty-minute job. Your edges will tell you it worked.