Most home cooks own a knife set and use exactly one knife from it. The chef's knife does the onions, the paring knife opens packaging, and the bread knife sits in the block looking expensive. Then a tomato turns into a squashed mess and the whole set takes the blame. It was never the set. It was the edge, and no edge survives a week of cooking without a kitchen knife sharpening routine behind it.
I have spent sixteen years on the line and behind a butcher counter, and I will tell you the same thing I tell every cook who asks what to buy: the knife matters less than what you do to it. A modest blade with a real maintenance habit will out-cut an expensive knife that lives in a drawer and gets rinsed under hot water. So this guide is about the habit first and the gear second, and both tools below exist to make that habit easy enough to keep.
Why you should trust me
Six years as a line cook in fine dining, four running a butcher shop, and the rest of my working life sharpening. I have put an edge on thousands of blades, from stamped grocery-store knives to Japanese gyutos worth more than my first car. I own a 1,000-grit stone and I use it, usually in the morning before service, because the morning sharpness test is the only review that matters. A sheet of printer paper, held up, cut from the top down. If the blade snags or tears, it goes back on the stone.
That test is also how I judge everything else. Not the marketing copy, not the number of pieces in a block. The paper, the tomato, and whether the knife still feels right after two hundred cuts.
How I picked and how I tested
I judge knives on four questions. Does it hold an edge through a full prep shift? Is the handle comfortable after two hundred cuts? Can I sharpen it without fighting a bolster? Would I reach for it on a busy Saturday night?
Those questions apply to knives I own and cook with. The two items below are a different kind of recommendation, so let me be straight with you. I have not run a fifty-pound prep shift on either of them, and I am not going to pretend I did. What I can tell you is what job each one solves, what to expect from it, and where it belongs in a routine. One is a first set for a kitchen that does not have one. The other is the tool that keeps whatever you already own cutting, and of the two, the sharpener is the more important purchase.
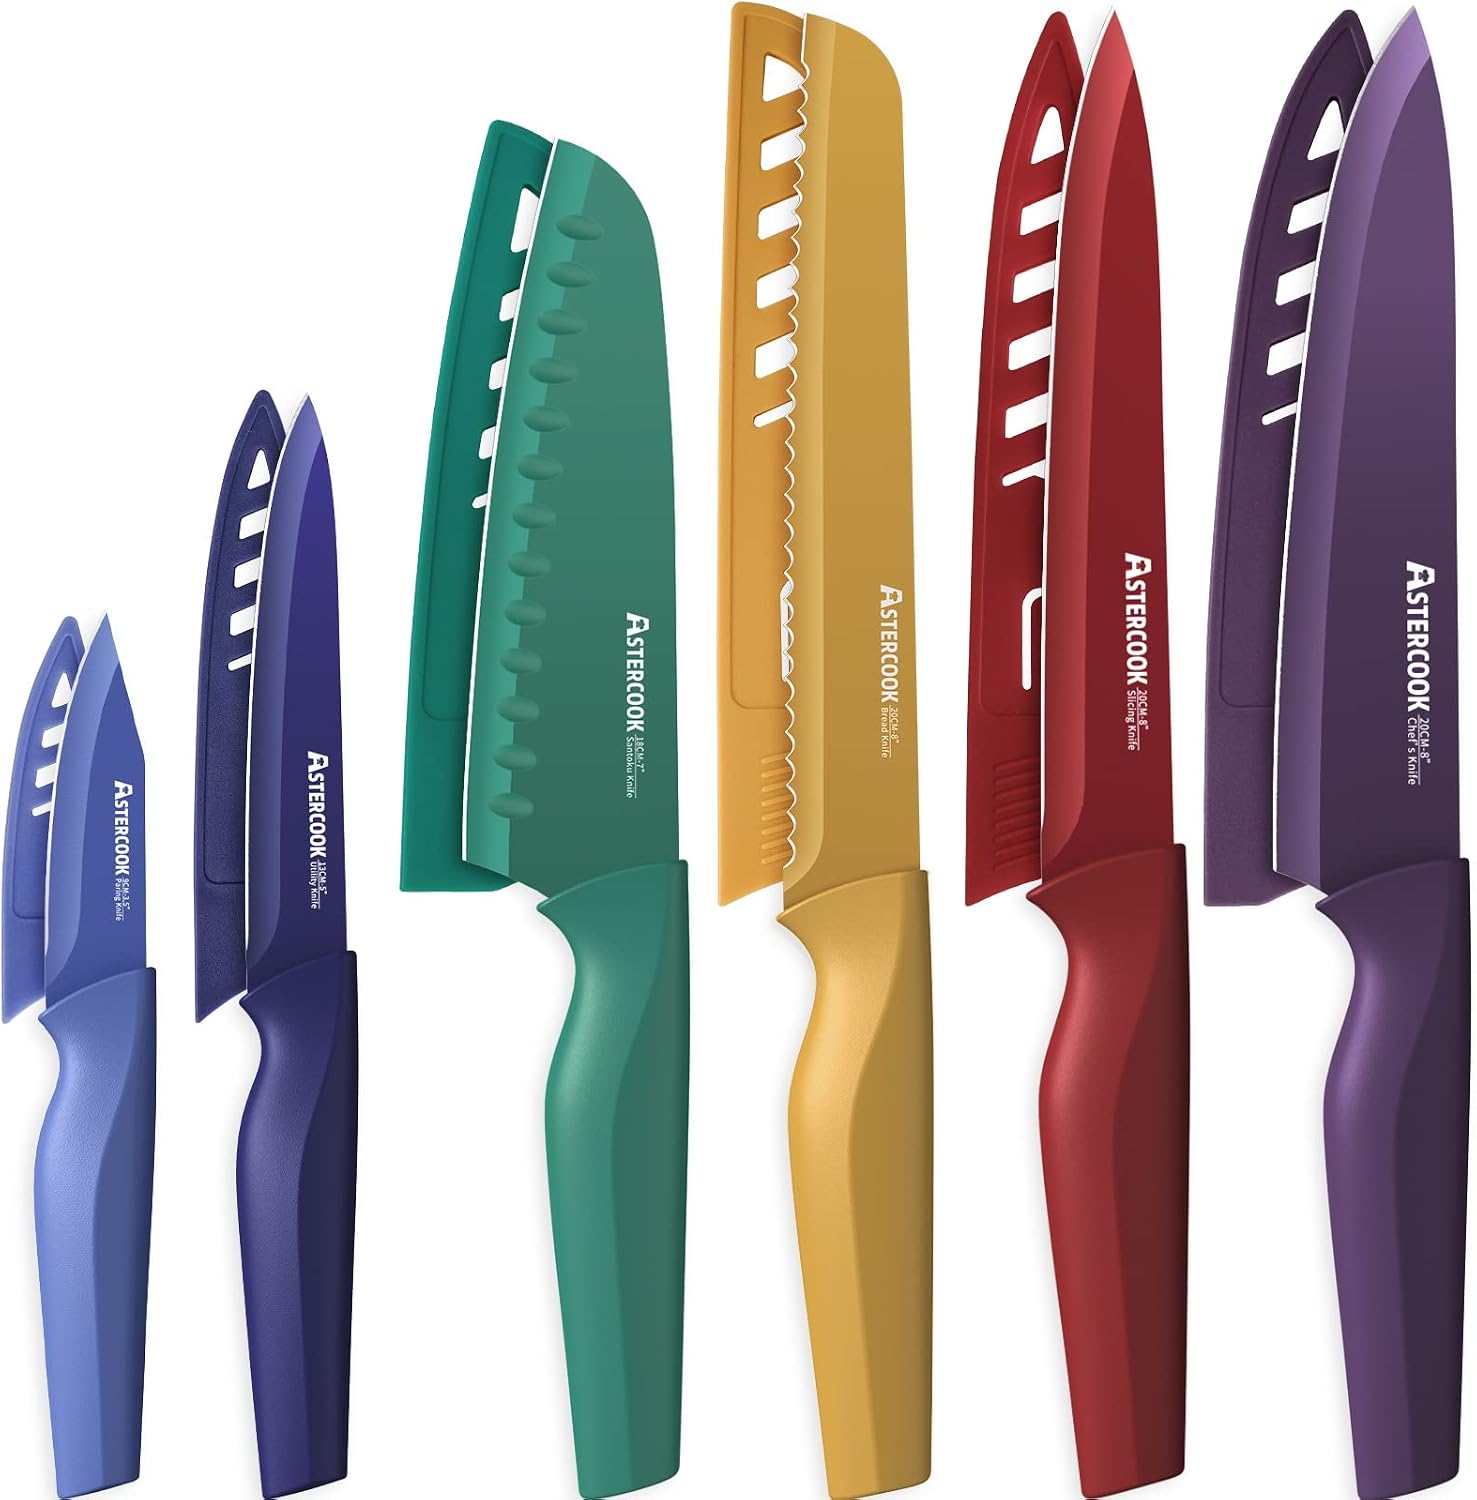
The set that starts the habit: Astercook Knife Set, 12 Pcs Color-Coded Kitchen Knives Set, 6 Color Anti-Rust Coating Stainless Steel Chef Knife Sets with 6 Blade Guards Dishwasher Safe, Perfect Holiday Gifts for Kitchen
 Visit on Amazon →
Six knives, six colors, six blade guards. The color coding is the feature I would actually pay attention to, because it solves a problem most sets ignore: keeping raw protein and vegetables on separate blades. Give the red handle to meat, the green one to produce, the yellow one to the bread board, and nobody has to guess which knife touched the chicken. The guards matter just as much, since a knife that lives loose in a drawer gets its edge knocked off by the can opener.
The blades carry an anti-rust coating over stainless steel, which is the kind of detail that tells you this set is built for a household that cooks and cleans in a hurry rather than a household that oils blades and hangs them on a strip. It is listed as dishwasher safe. I would still hand wash it. Heat, detergent, and the rattle against other dishes are hard on any edge, and no coating changes that.
Flaws but not dealbreakers: Six knives means six edges to maintain, and the pieces you will actually use are the chef's knife and the paring knife. Expect the coating to be what protects the steel, so wipe dry rather than letting them drip-dry overnight.
This is the set for a first apartment, a rental kitchen, a household with two cooks, or anyone who wants a full drawer of knives that will not be ruined by a roommate. It is also a genuinely sensible gift, because a color-coded set is self-explanatory the moment it comes out of the box.
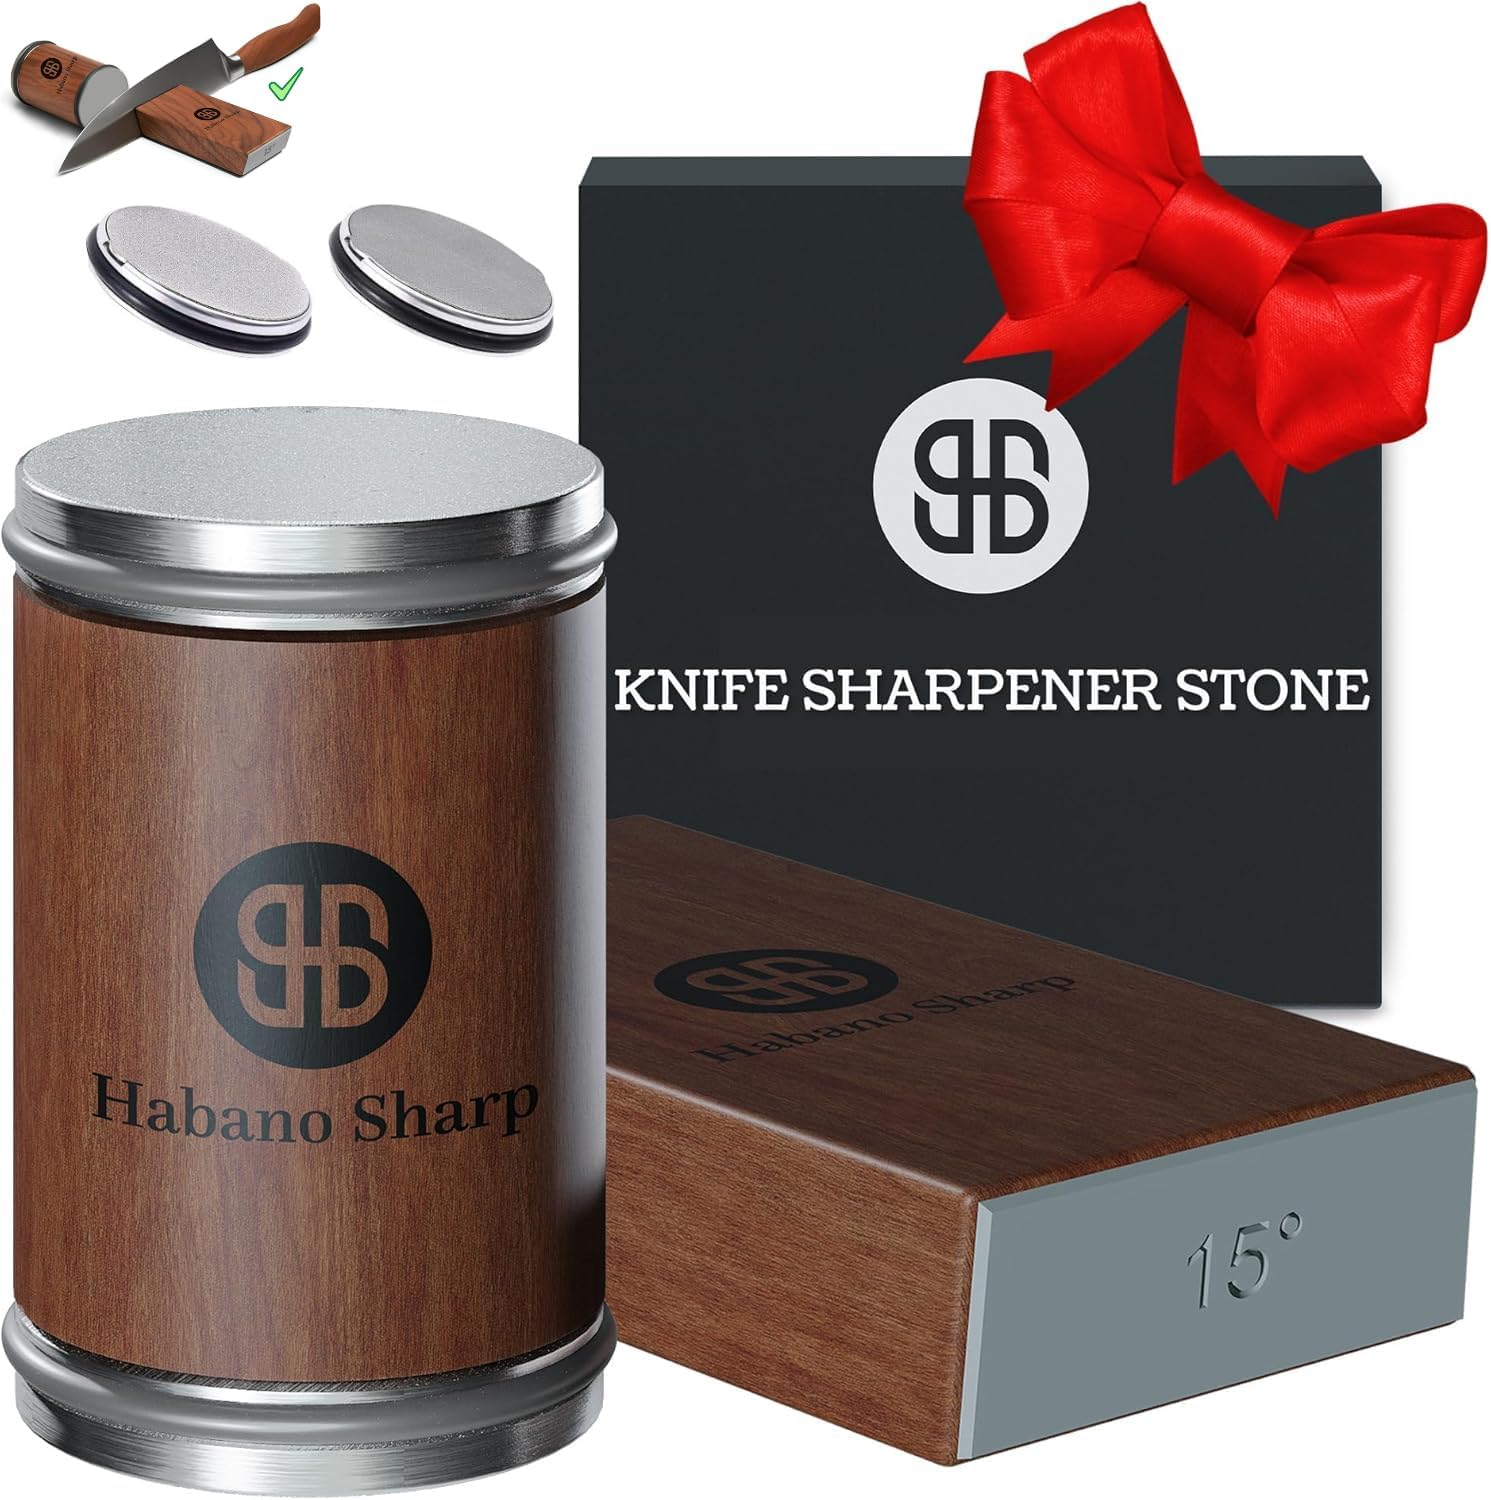
The maintenance tool that keeps it honest: Rolling Knife Sharpener Kit - Diamond Sharpening Tool for Steel of Any Hardness, Knife Sharpener Stone with 15 & 20 Degree Magnetic Angle Support for Kitchen Knives, Easy to Use(Brown)
 Visit on Amazon →
Here is the honest truth about sharpening: the hard part is not the stone. It is holding one consistent angle for two hundred passes without your wrist drifting. A rolling sharpener fixes that by flipping the problem. The blade stays still against a magnetic angle support, and the diamond stone rolls across the edge at a fixed angle. That is why this design has taken over home kitchens, and it is why I would hand it to a beginner before I handed them a whetstone.
Two angles are built in. Twenty degrees is the Western standard, and it is what you want for German-profile knives, heavier chef's knives, and any budget set like the one above, because a slightly wider angle is more durable on softer steel. Fifteen degrees is for thinner, harder Japanese-style blades and for paring knives where you want a finer edge. Diamond abrasive cuts steel of any hardness, which matters if you own something hard enough that a cheap oilstone just polishes it and skates.
Flaws but not dealbreakers: The angle support gives you two choices, not infinite adjustment, so a knife ground at seventeen degrees gets pushed toward one or the other. It also will not rescue a badly chipped edge; that is a job for a coarse bench stone and patience. And because the guide holds the blade magnetically, a blade that does not sit flat against the support will not get a clean bevel.
Buy this if you own knives and no sharpening system. It is the difference between a set that is sharp for three months and a set that is sharp for years.
The actual sharpening workflow
This works on any Western knife and any budget set. Eight steps, fifteen minutes the first time, five minutes once you have done it twice.
Step one: identify your angle. German and most Western knives are ground around twenty degrees per side. Japanese knives are usually fifteen. If you do not know, start at twenty. A slightly wider angle will still cut well, and it will hold up longer on softer steel.
Step two: match the angle support. Set the magnetic guide to the angle you picked. The blade sits flat against it, edge facing out. The magnet holds the knife steady so your off hand is free.
Step three: start on one side, heel to tip. Roll the diamond stone across the edge in steady passes, keeping light pressure. You are not trying to grind the knife away. Ten to fifteen passes down one side is plenty for maintenance sharpening.
Step four: flip and repeat. Same number of passes on the other side. Counting matters more than people think. Uneven passes are how you end up with a knife that pulls to one side through an onion.
Step five: test on paper. Hold a sheet up and cut from the top down. Clean cut, you are done. Snagging, give it another five passes per side.
Step six: stop when it cuts. This is the step everybody skips. More passes means more steel removed, and steel is the one thing on a knife you cannot add back.
Step seven: hone before you cook, not instead of sharpening. A honing steel or ceramic rod realigns a rolled edge. It does not remove metal, so it cannot create a new edge. Use it for ten seconds before each session and your knives will go weeks longer between real sharpening.
Step eight: put it on a schedule. Home kitchen: every four to eight weeks, depending on how much you cook. Professional kitchen: weekly, minimum. Write it on the calendar next to the grocery list. Sharpness is a habit, not a purchase.
Hone versus sharpen, the distinction most people get wrong
A honing steel is not a sharpener. It is a realignment tool. The fine edge on a working knife bends and rolls with use, and a few strokes on a steel push it back into line. That buys you days or weeks of performance.
Sharpening removes steel and cuts a fresh bevel. That is what the diamond rolling kit does, and it is what a stone does. You need both tools, and you need to know which one you are reaching for. If your knife is tearing tomatoes, honing first is worth a try. If honing no longer fixes it, sharpen.
Storage and the habits that dull a knife
Three things kill edges faster than cooking does. The dishwasher, the knife block, and the loose drawer. A dishwasher combines heat, detergent, and the clatter of other dishes against the edge. Even a set labeled dishwasher safe will last longer washed by hand and dried immediately.
A traditional block dulls blades every time you slide one in, because the slot edge drags across the cutting edge. If you like the look of a block, fine, but keep the knives you actually use on a magnetic strip or in a drawer with the blade guards on. The six guards that come with a color-coded set are not packaging. They are storage.
And keep the surface you cut on in mind. Glass and bamboo are edge killers. Plastic and end-grain wood are kind. A dull knife is often a knife that has been cutting on the wrong board.
The competition and why it lost
The German sets and the Japanese gyutos get their own guide, and they deserve one. A forged German chef's knife with a full tang is a different animal from a budget set, and it costs accordingly. If you are building a kit you will hand down, that is the direction to go, and it is a conversation about steel, hardness, and bolster geometry.
Pull-through carbide sharpeners are the other thing people ask about. They remove a lot of metal fast, they leave a rough edge, and they shorten a knife's life. An electric sharpener is faster still and takes off more steel still. A whetstone is the best edge you can get and has the steepest learning curve, which is exactly why a fixed-angle diamond roller is the recommendation here.
None of those are bad tools. They are answers to different questions. This guide is about getting a normal kitchen to sharp, and staying there.
What this all costs
Check current Amazon price on the set, and check current Amazon price on the sharpener. That is the whole outlay, and the sharpener is the one that pays you back, because it protects every knife you will ever buy after it.
Run the math the way a kitchen does, in meals rather than dollars. A set that gets used daily for two years is hundreds of dinners. Divide the cost by that and you are into pennies per meal, which is less than the onion you are cutting. A professional sharpening service charges per knife, every time, and you still have to drive there.
The gear is the easy part. Fifteen minutes with a fixed angle and a diamond stone, then ten seconds on a steel before dinner, is the difference between a drawer of dull metal and a set that does what it was built to do.
That is the job. Your knives were built to cut. Let them.